The Ultimate Guide to Preventing Air Bubbles When Mixing
Jun 21, 2024 By Nancy Miller
Mixing ingredients without capturing air bubbles is a critical skill in various fields, including baking, pharmaceuticals, and industrial manufacturing. Air bubbles can compromise the texture, consistency, and integrity of the final product, leading to undesired results. This guide aims to provide you with practical tips and techniques to prevent air bubbles from forming during the mixing process. Whether you're a professional or a hobbyist, understanding the causes of air bubbles and how to mitigate them can significantly improve the quality of your work. From selecting the right tools to adopting proper mixing techniques, we will cover all the essential aspects to ensure a smooth and bubble-free mixture. Let's delve into the world of perfect mixing and achieve flawless results every time.
Causes of Air Bubbles:
- Improper Mixing Techniques: Rapid or vigorous stirring can trap air, which may lead to unwanted bubbles in your mixture. This can affect the texture and consistency of your final product, making it less smooth and uniform.
- Incorrect Mixing Tools: Using unsuitable tools can introduce air into the mixture, which can lead to unwanted bubbles and affect the consistency and quality of the final product. It's crucial to select the right tools to ensure a smooth and uniform blend.
- Inadequate Mixing Times: Insufficient mixing can lead to uneven distribution of ingredients and the trapping of air bubbles within the mixture. This can result in poor texture and quality of the final product, potentially affecting its taste and overall consistency.
- High Viscosity: Thicker mixtures are more prone to trapping air, which can lead to issues such as uneven texture and potential flaws in the final product. This is especially important to consider in baking and cooking, where the consistency of the mixture can significantly impact the outcome.
Preventive Measures:
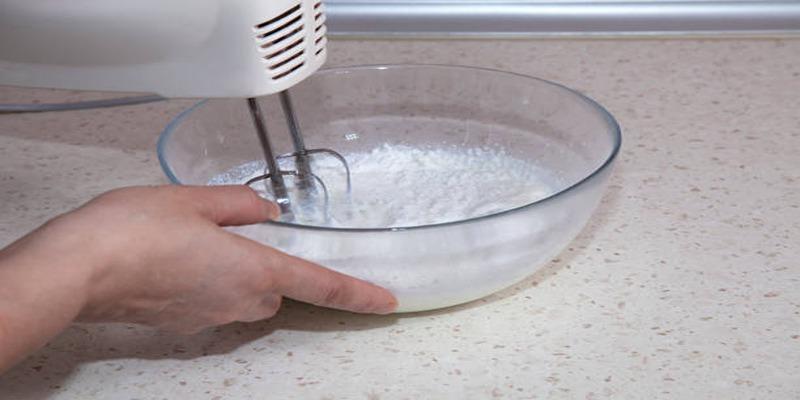
Choose the Right Mixing Tools
- Hand Mixers: Ideal for small batches and delicate mixtures. Use slow, steady motions to minimize air entrapment.
- Electric Mixers: Excellent for larger batches. Opt for low-speed settings and paddle attachments designed to reduce air incorporation.
- Vacuum Chambers: For highly sensitive applications like resin, vacuum chambers can remove air bubbles before curing.
Optimize Mixing Techniques
- Gradual Addition: Slowly add ingredients to the mixture, reducing the likelihood of trapping air.
- Circular Motions: Stir consistently in a circular motion rather than aggressive back-and-forth movements.
- Avoid Over-Mixing: Over-mixing can introduce more air. Mix just enough to combine ingredients thoroughly.
- Scraping the Sides: Regularly scrape the sides of the mixing container to ensure all ingredients are incorporated, reducing air pockets.
Control Environmental Factors:
- Temperature: Mix at recommended temperatures. Colder environments can increase viscosity and air entrapment.
- Humidity: High humidity can affect the mix's consistency and bubble formation. Maintain optimal humidity levels in the mixing area.
Specific Applications:
Concrete
- Vibration: After pouring the concrete, use a concrete vibrator to remove air bubbles. This ensures the mixture is evenly distributed and prevents weak spots that could compromise the structure's integrity.
- Plasticizers: Add plasticizers to the mixture to improve material flow, enhance workability, and reduce air entrapment, ensuring a smoother and more durable final product.
- Proper Pouring Techniques: Pour concrete in layers, ensuring that each layer is carefully leveled and allowed to settle completely before adding the next. This process helps to prevent air pockets and ensures a strong, even finish for your project.
Paint
- Slow Stirring: Use a paint stirrer at a low speed to ensure the paint is mixed thoroughly without creating excessive bubbles or splatters.
- Strain the Paint: Use a fine mesh strainer to remove bubbles before application. This step ensures a smoother texture and consistency, preventing any imperfections in the final result. Taking a few extra moments to strain can make a significant difference in the quality of your work.
- Temperature Control: Ensure both the paint and application surface are at the recommended temperatures. This helps the paint adhere properly and prevents issues such as cracking or peeling. Be sure to check the manufacturer's guidelines for specific temperature ranges suitable for optimal application.
Resin
- Vacuum Degassing: Use a vacuum chamber to remove bubbles from the mixture before pouring it into the mold. This helps ensure a smooth and even finish, preventing imperfections that could arise from trapped air pockets.
- Slow Mixing: Mix the resin slowly and carefully to avoid introducing air bubbles, which can cause imperfections in the final product. Ensure you use a steady hand and take your time during this process for the best results.
- Layering: Pour resin in layers, allowing each layer to cure and bubbles to escape between pours. This method ensures a smooth and even finish, preventing imperfections caused by trapped air.
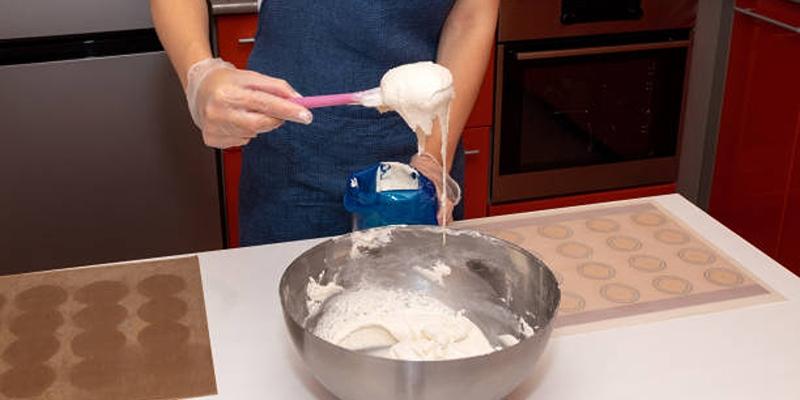
Culinary
- Fold Ingredients: When mixing batters, gently fold the ingredients together rather than stirring vigorously. This helps to maintain the desired texture and prevents overworking the dough, which can result in a dense rather than light and airy final product.
- Resting Period: Allow the batter to rest for a few minutes before baking to give the bubbles time to rise to the surface. This step ensures a lighter, fluffier texture in your final baked product and helps to achieve a more even bake.
- Sifting: Sift the dry ingredients to reduce clumps and introduce less air into the mixture. This ensures a smoother texture and more consistent results in your baking, preventing unwanted lumps in your final product.
Strategies for Preventing Air Bubbles When Mixing:
Pre-Mixing Preparations:
- Cleanliness: Thoroughly clean all mixing tools and containers before use to prevent unwanted textures and bubbles caused by residual materials.
- Dry Tools: Ensure tools are completely dry, as excess moisture can react with certain ingredients (such as resin or concrete), leading to bubble formation.
- Temperature Equilibration: Allow all ingredients to reach the same temperature before mixing. Drastic temperature differences can result in inconsistent mixing and air pockets.
- Pre-Mix Dry Ingredients: For culinary applications, pre-mix dry ingredients to eliminate clumps that could trap air.
Techniques for Different Mixing Phases:
Initial Mixing Phase
- Slow Start: Begin at the lowest speed possible to combine ingredients gradually and minimize air incorporation.
- Layered Addition: Add ingredients in stages rather than all at once to facilitate smoother integration.
Intermediate Mixing Phase
- Tool Angle: Hold the mixing tool at an angle to create a vortex that helps naturally expel air from the mixture.
- Pulse Mixing: Use the pulse setting on electric mixers to gently combine ingredients without continuous high-speed agitation.
Final Mixing Phase
- Final Stir: Conduct a gentle final stir to release any remaining air pockets.
- Smoothing: For thick mixtures like concrete or resin, gently tap the container on a hard surface to help bubbles rise to the surface.
Conclusion:
Proper mixing techniques and environmental factors play a significant role in achieving the desired consistency, texture, and overall quality of various products. By choosing suitable tools, optimizing mixing techniques, and controlling environmental factors, you can prevent common issues such as air entrapment and achieve a smooth and uniform final product. Whether you're working with concrete or baking a batch of cookies, taking the time to mix correctly can make all the difference in the end result. So remember to always pay attention to these key factors when mixing your next batch of ingredients for optimal results.


